
How It Works
The Funding Source features allows ZoomGrants Administrators to allocate and track funding from specific sources to programs and applications.
How To Set It Up
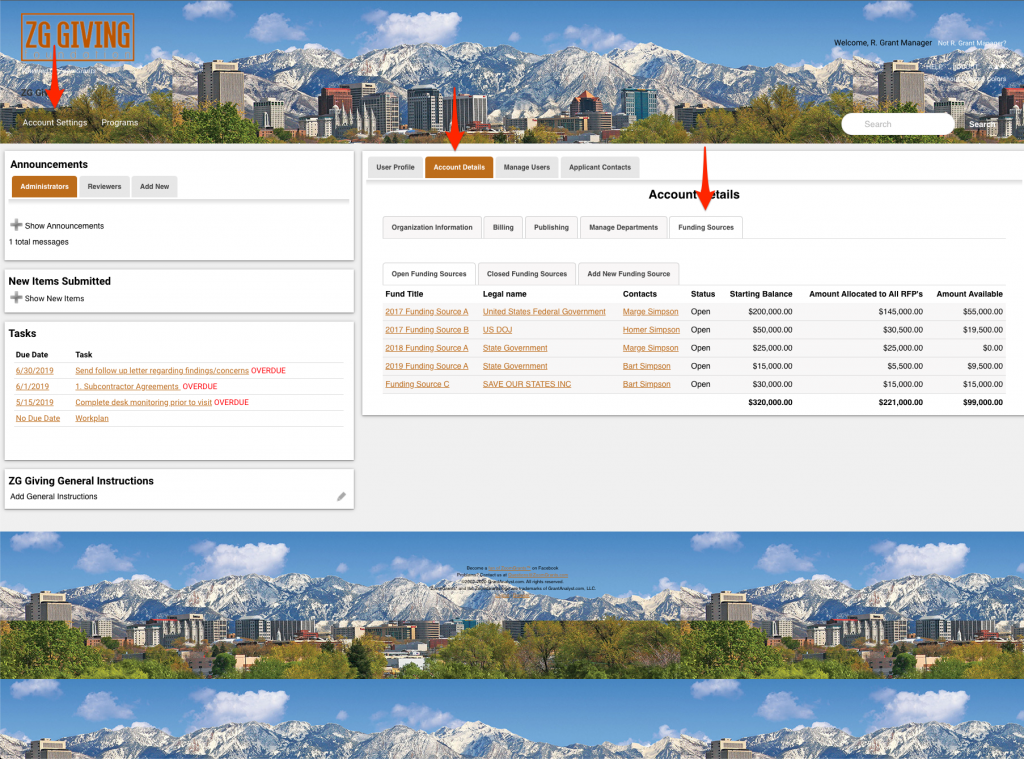
Account Settings > Account Details Tab > Funding Sources Tab
To set up the Funding Sources feature, first you need to ensure ZoomGrants has turned it on for the account, and then for each program in which you wish to use the advanced budget tracking features it provides.
Step 1: Set up the different funding sources at the Account level
The first step is to create the different types of funding categories which you would like to track and from which you will be able to “draw” funds from to allocate to programs.
Start by clicking the “Funding Sources” tab which is displayed in the upper right hand corner under the Account Settings tab. (If you do not see this button, contact ZG support (adminquestions@zoomgrants.com) to ask that Funding Sources be turned on for your account. )
Add New Funding Source
Account Settings > Account Details Tab > Funding Sources Tab > Add New Funding Source Tab
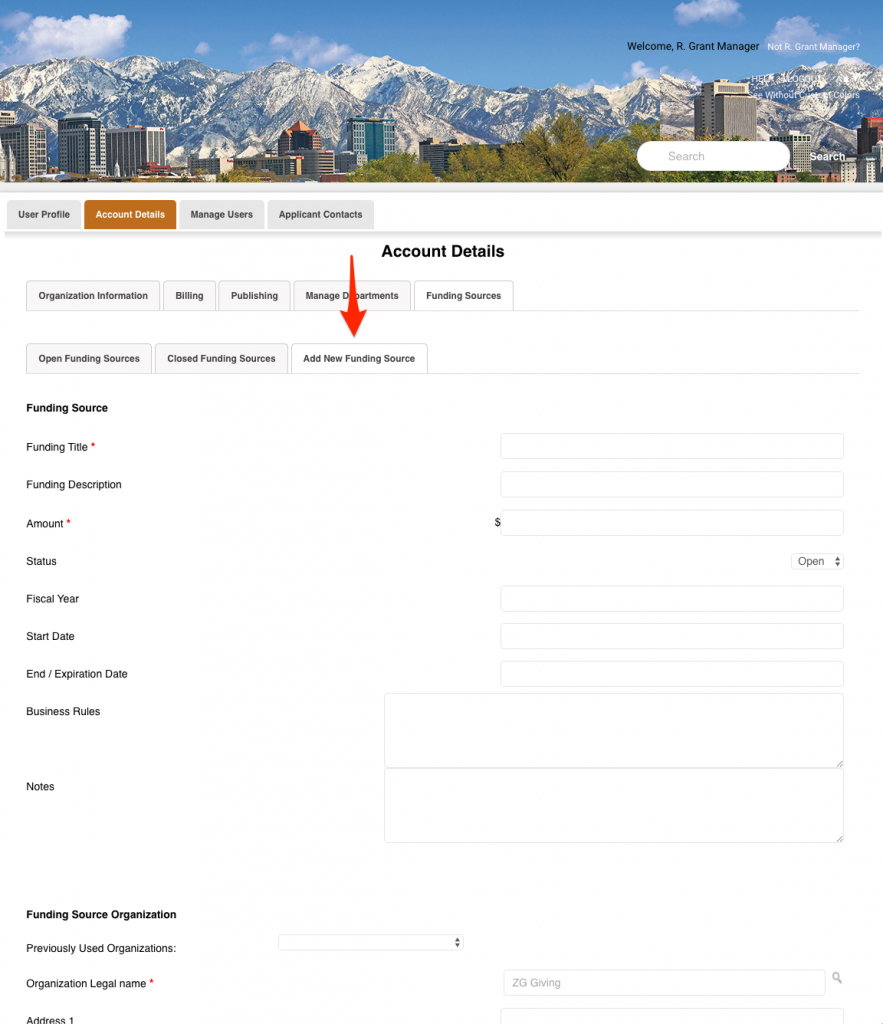
Click the “Add Funding Sources” tab, and complete at least the required information (marked with a red asterisk) to capture other basic information about that funding source. You can easily open it to edit this information later if needed.
Complete the Funding Source section by inputting the following required fields that are denoted with an asterisk:
Funding Title
Amount
Organization Legal Name
Funding Contact First Name
Funding Contact Last Name
Funding Contact Email Address
Any additional information can be added to help define the Funding Source, however, it is not required for the Funding Source to be saved inside of ZoomGrants.
Funding Source Organization

When completing the Funding Source Organization section, choose from previously used organizations or click the magnifying glass icon to search for the Funding Source Organization in our records.
In the Organization Search window, either enter the organization name or EIN number. If your search matches the organization you’re looking for, click the select link to the left of the record to choose that organization and auto-populate the organization fields.
If your search does not yield the result you’re looking for, do another search, or close the window. If you don’t find it in our records, you can input the organization information manually.
Funding Contact
Complete the Funding Contact section by inputting the contact information or choosing a person from the list of previously used contacts. Note that the contact person is typically the administrator within your organization primarily responsible for that funding source.
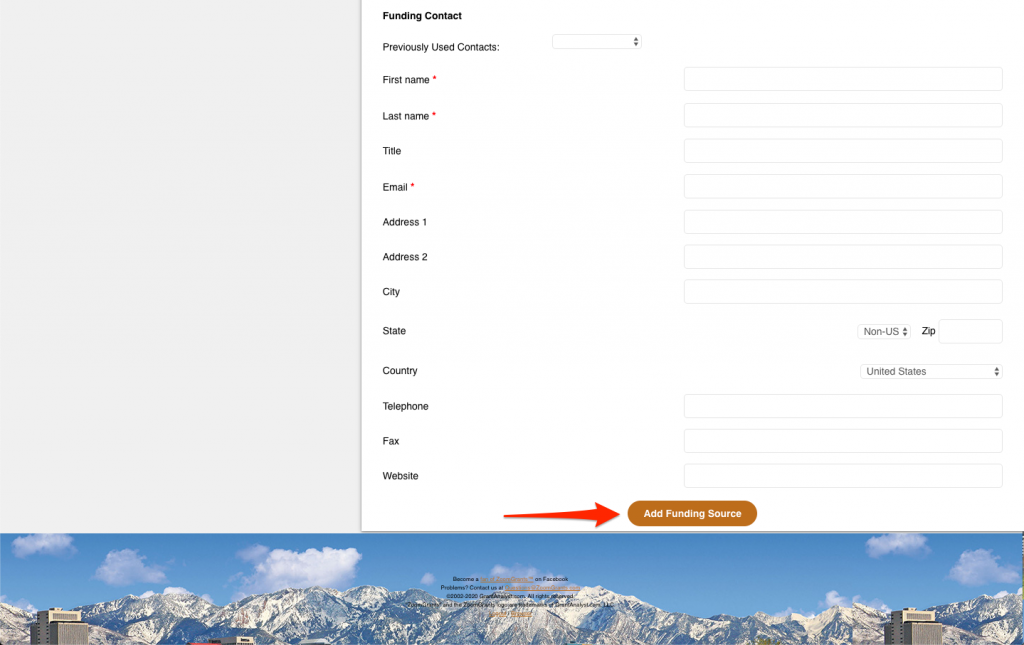
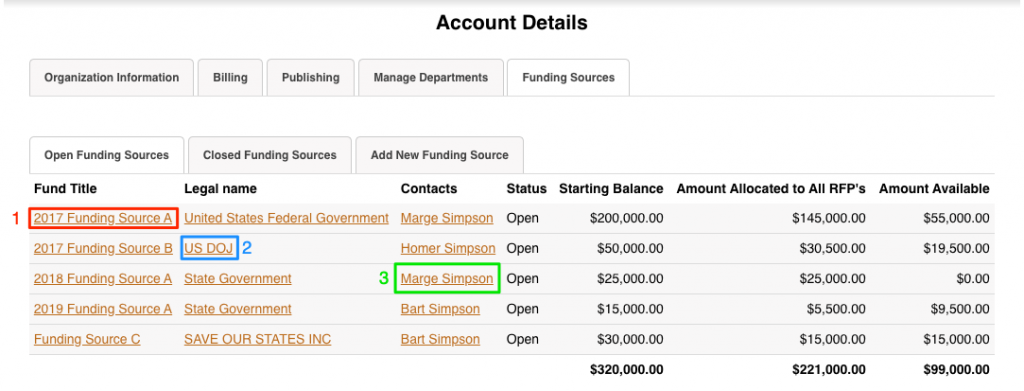
Click the ‘Add Funding Source’ button at the bottom of the page once complete, and you should next see the Funding Source displayed under the ‘Open Funding Sources’ tab.
Step 2: Allocate funding sources to Programs in the account
Program Setup > Financial Tab
Once all of your different funding sources have been set up, you would next need to allocate funds to each program.
- Click into any program, then click into Program Setup, and then click the Financial tab. Near the top, uncheck the box which asks if you want to ‘Hide Funding Sources’.
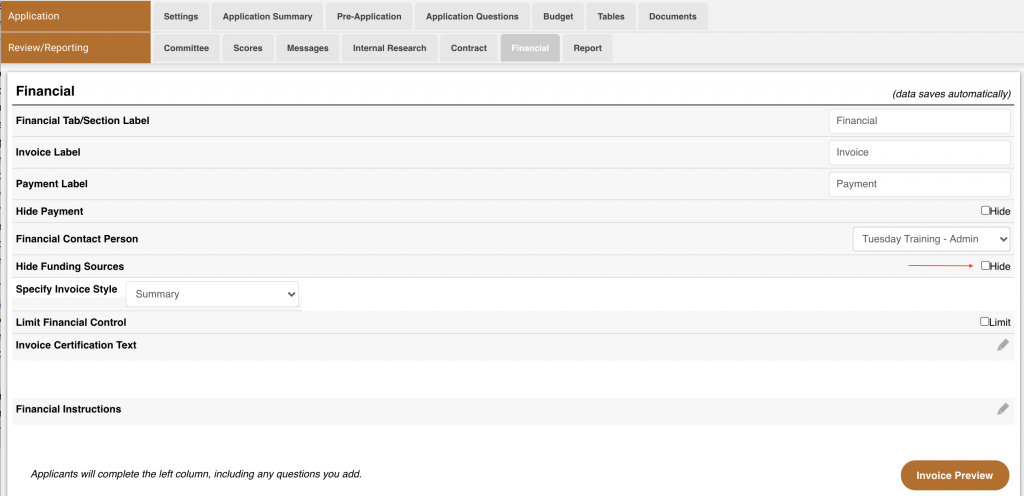
- Next, choose whether you will use the Summary style invoice, or the Line Item style invoice (line item descriptions are taken from either section you choose in the original application budget).
- If Line Item Style Invoices are used, choose if these line items will be pulled from Section 1 or from Section 2 of your budget tab.
- Scroll to the very bottom, and your Funding Sources which you have created at the account level will now be available at the program level.
- Enter an amount from the open funding sources from which you will draw funds to allocate to this program.
Step 3: Approve applications and allocate funds under the Funding Allocations Tab
Applications Tab >> Funding Allocations Tab
You must have selected that application to be approved for funding before you can allocate funds to it under the Funding Allocations tab.
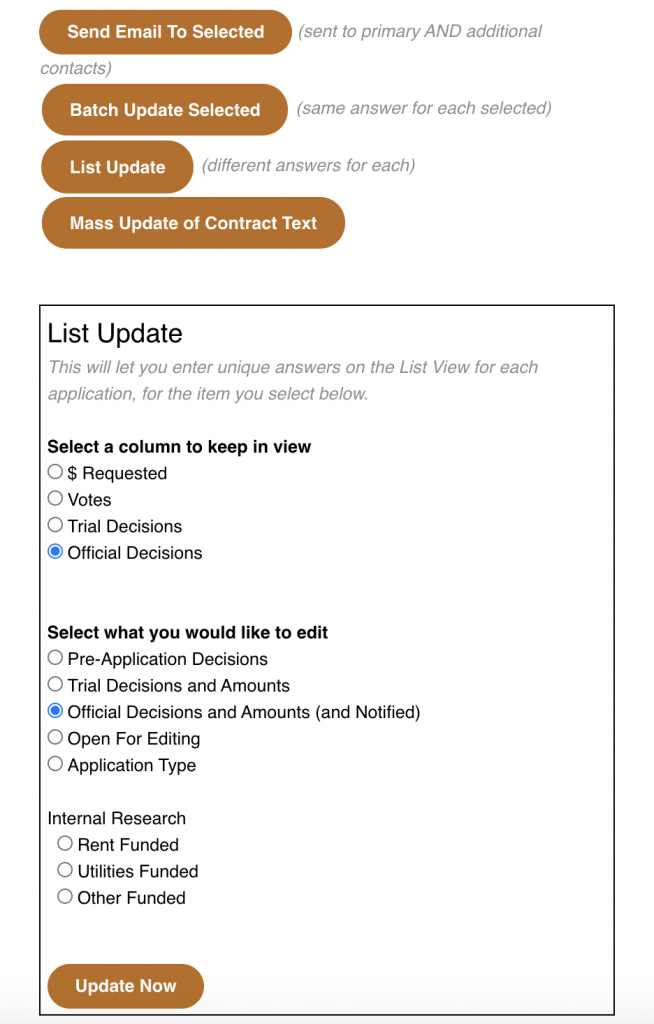
- To do this quickly, click into the Applications list, and at the bottom, click the “List Update” Button; in the box which appears below, choose what you would like to edit as ‘Official Decisions and Amounts and NOTIFIED and click the update button. This will generate a table for you to be able to update the Decision (Approved/Declined) across all submitted applications.
- Once you have approved the applications, you will be prompted to go to the ‘Funding Allocations’ tab to update the award amounts. Click into the ‘Funding Allocations’ tab to do so.
- In the Funding Allocations tab, you will see the available sources of funds you created at the account level, and allocated at the program level, from which you can next allocate to different applications within that program.
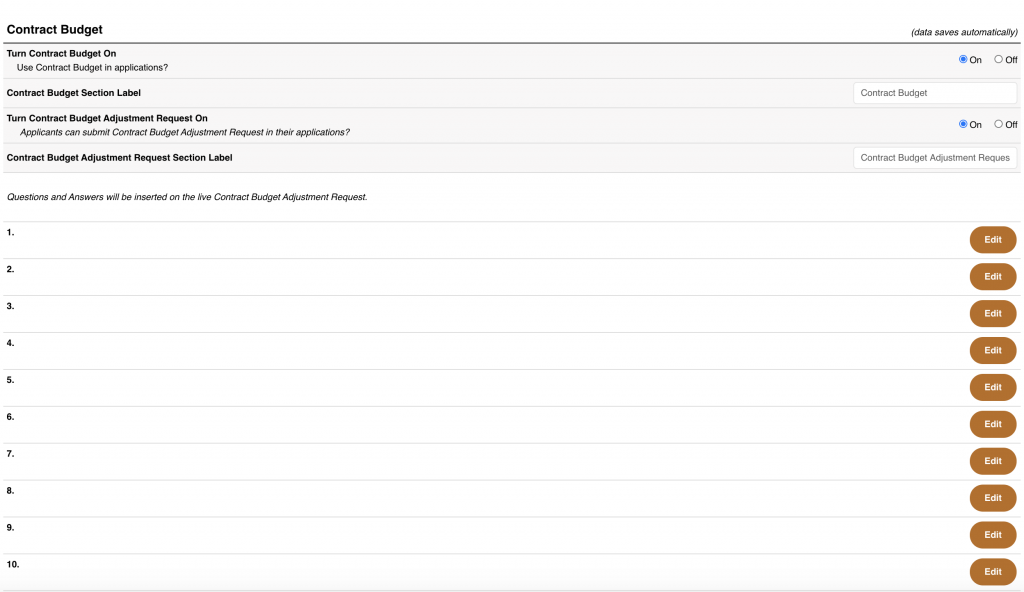
Step 4: Set up the Contract Budget
Program Setup > Budget Tab > Contract Budget
This feature unlocks when Funding Sources is used. After you’ve decided which applications to fund, you can use the Contract Budget feature to input the official budget for each line item, which allows the administrator to adjust the requested amount to the actual amount awarded for each line item.
- In program Setup, Click the Budget tab, and scroll to the bottom. Turn the Contract budget on by clicking “yes” where indicated, and turn on the ‘Contract Budget Adjustment Request’. Create at least one question (or as many as ten) to set up this feature (e.g. “Describe your request to adjust the contract budget.”)
- Click into each approved application to which you have awarded and allocated funding to, and complete the new column titled “Contract Budget” in order to finalize decisions for funding at the line item level. This is the final step to document admin confirmation of award, and to fully enact and set up this feature.
Editing an Existing Funding Source
Funding Sources Tab > Open Funding Sources Tab OR Closed Funding Sources Tab
Edits to the Funding Source title, amount, organization information, and contact information can be made in both Open Funding Sources and Closed Funding Sources.
- Fund Title – click to edit that Funding Source, including updating the dollar amount associated with the source.
- Legal Name – click to edit that Funding Organization.
- Contacts – click to edit the Funding Contact or add an Additional Contact.
The data will save automatically when updating any section of the funding source.
Finishing Up
Once all allocations and numbers are set to exactly how you would like them to be, this may be the appropriate time to ‘Notify’ the applicants of those decisions. Only then would they be able to see those awards in the ZoomGrants system, and access Financial, reporting, and other post-award features in ZoomGrants.
Please let us know when we can assist. The time spent to set up initially will be worth it, because once implemented, this feature will allow for automatic and more advanced budget tracking when utilizing the Invoice and Financial features in ZoomGrants.