
As a cloud-based system, ZoomGrants makes it easy for applicants to work on and submit their applications. ZG takes the program content and requirements set up by the program administrator and provides helpful features to facilitate the application process. Read about the basics, below.
Step 1: Go to Organization’s ZoomGrants Page
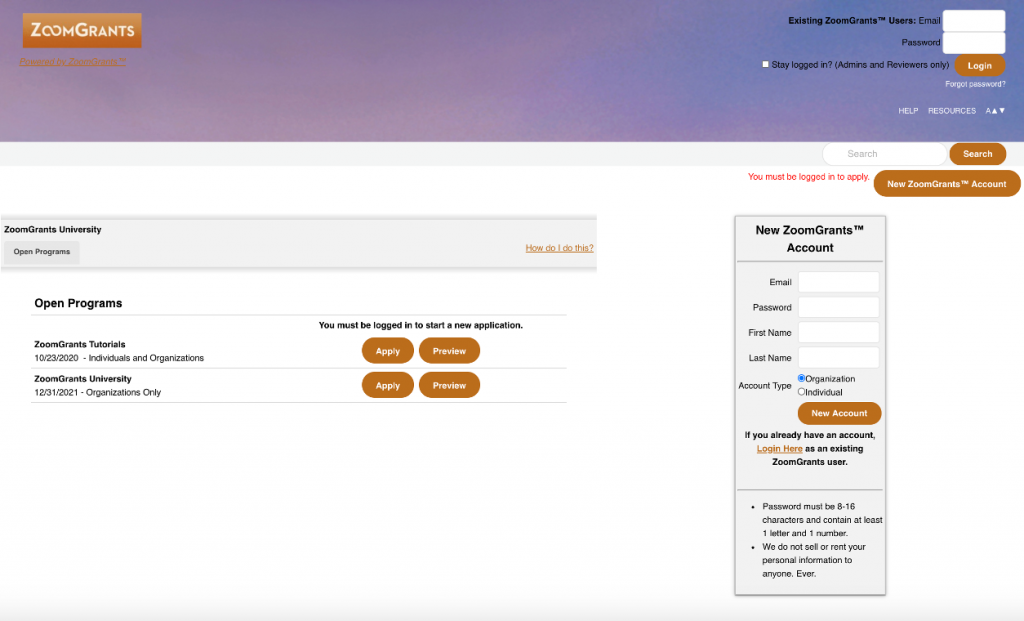
Navigate to the ZoomGrants page for the organization by using the link provided to you by the program administrator.
NOTE: For this first step, do not go to the ZoomGrants homepage. Once you’ve started an application using the link above, you can log in at https://ZoomGrants.com/login
Step 2: Create an Account & Log In
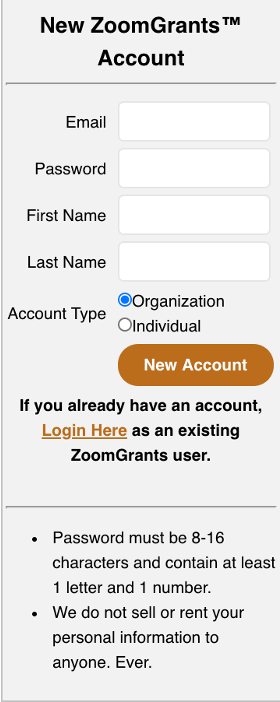
Create your ZoomGrants account and log in using the New ZoomGrants Account box on the righthand side. If you already have an account, log in using the boxes in the upper right corner of the page.
NOTE: In ZoomGrants, each application is officially associated with a single account and each account is ‘owned’ by a single user and accessed by a single email address. We recommend that the person who will be the primary contact for applications creates the first account for an organization. Once that person creates their account, gets logged in, and starts the application(s), they will be able to invite other people to collaborate on all or some of the applications in their account.
Step 3: Create Your Application
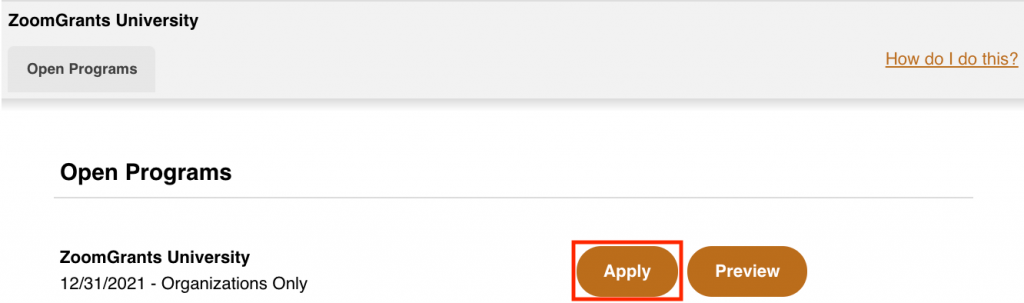
Click the Apply button next to the appropriate program to create your first application for that program.
Step 4: Invite Others to Collaborate (as necessary)
Summary Tab (1st tab of application) > Collaborators
Use the Collaborators section in the first tab of the application to invite others to work on this application with you.
- Enter their email address, first/last name, and title.
- Indicate on which sections they are allowed to collaborate.
- Click the Invite button. An invitation will be sent to their email address. They’ll be able to set up an account by which they can access and edit the application.
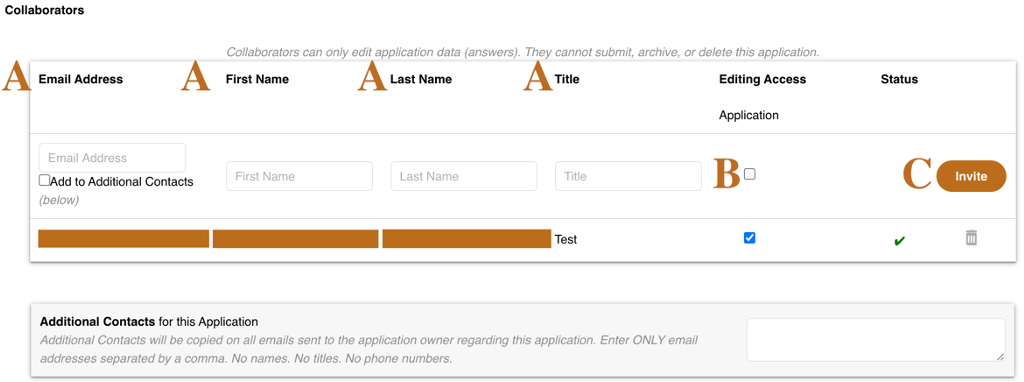
NOTE: If granted access, collaborators can do everything that the application owner can do except: editing the Applicant and Organization information sections in the first tab of the application and submitting, archiving, or deleting the application
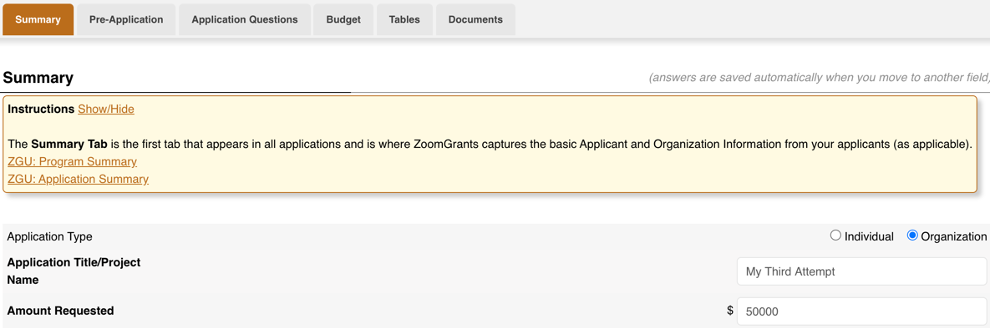
Step 5: Fill out Questions, Budget, & Tables
Answer the questions and fill in the budget and tables.
Program/Application Content
In each program, the program administrator decides what content they’d like to request from the applicant. As a result, the tabs, questions, and requested documents will differ between programs and organizations. (For ZGU search and training purposes, refer to the default tab labels to find the appropriate resources.)
Admins also decide how to capture the information from their applications. They can choose the question type for each question, what features to use, what files to request, etc.

- Contact Admin Tab
If you have a question about the application content or what is expected of you, please use the Contact Admin tab in the application in your account to send an email directly to the program contact. The ZoomGrants tech support staff cannot answer content-related or requirement-related questions.
NOTE: Some question tabs may have a branching question, which will hide certain questions based on your answers to the branching question
Auto-Save Feature
The system will automatically save your answers as you move through the application and enter text then click outside of each text box or select a multiple choice or checkbox item and click into a new field. Click on the tabs to quickly jump to another section of the application or use the ‘Next’ and ‘Previous’ buttons at the bottom of the tabs to move sequentially through the application. You do not need to finish the application in one sitting nor do you need to intentionally save it.
Read more about the auto-save feature here.
Step 6: Upload Documents
Click the Upload button next to each applicable document request set up by the administrator to open up the File Upload Window for that request. Follow the instructions in the window to upload or link a file (or multiple) in that slot.
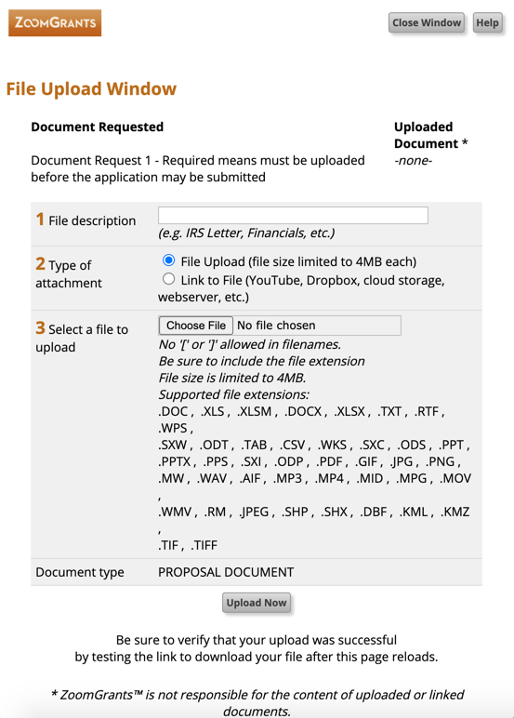
NOTES:
- Any document request marked with a yellow ‘Required’ note MUST have something uploaded or linked in that slot in order for your application to be submitted. If you feel a required request is not applicable to you, create a document in which you note the inapplicability and upload that into the slot.
- If the administrator has provided a template, click the orange ‘Template’ link to download that template. Fill it out, then upload it into that slot.
- Click the Help button in the File Upload Window to access a quick tutorial video (also available here: http://youtu.be/b0Ixkjss_Ow).
- If you finish your application by uploading documents, use the grey Refresh Page button to reload the page before clicking the Submit Now button to submit your application.
Step 7: Submit the Application
Click the gray Submit Now button (indicated by blue box) at the top of the application when you’ve completed the applicable content in every tab. The system will check to ensure you have answered every question and uploaded all ‘Required’ documents. Any skipped questions or missing documents will be listed in red (indicated by red box). When you’re done with your edits, use the gray Refresh Page button in the application to reload the page, then click the Submit Now button to re-run the check. If your application is complete, you’ll be able to enter your initials and officially submit the application.
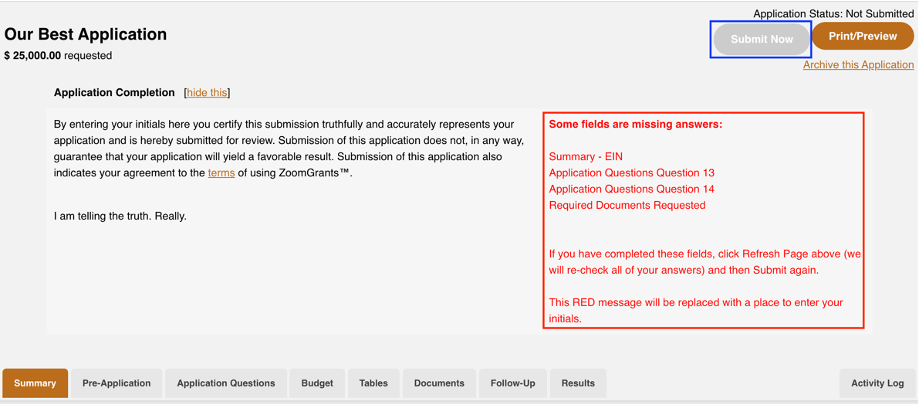
NOTE: If the administrator has chosen to let you make changes to your application even after it has been submitted, you can edit your submitted application up until the deadline passes. If you do make any changes, you do NOT need to ‘re-submit’ it. The changes are automatically reflected in the submitted application.
Check for Completion
The completion check verifies that you have answered the applicable questions and uploaded ‘Required’ documents, but you are responsible for ensuring you have completed the content requested in the budgets and tables (as applicable) and uploaded the documents that are requested but not ‘Required’.
Read more about the check for completion here.
Application Print Preview
Click the Print/Preview button to print a copy of your entire application. The Print/Preview also shows the calculated columns in tables in the Budget tab (if the program admin has set any up).