
The Budget tab features two pre-built, basic tables and a narrative field to capture simple budget data from applicants. Admins can choose which sections to set up and use.
How It Works
Program Setup > Budget Tab
Available Features
There are four standard features available in the Budget tab. As an admin, you can choose which features to use and how you’d like to set them up.
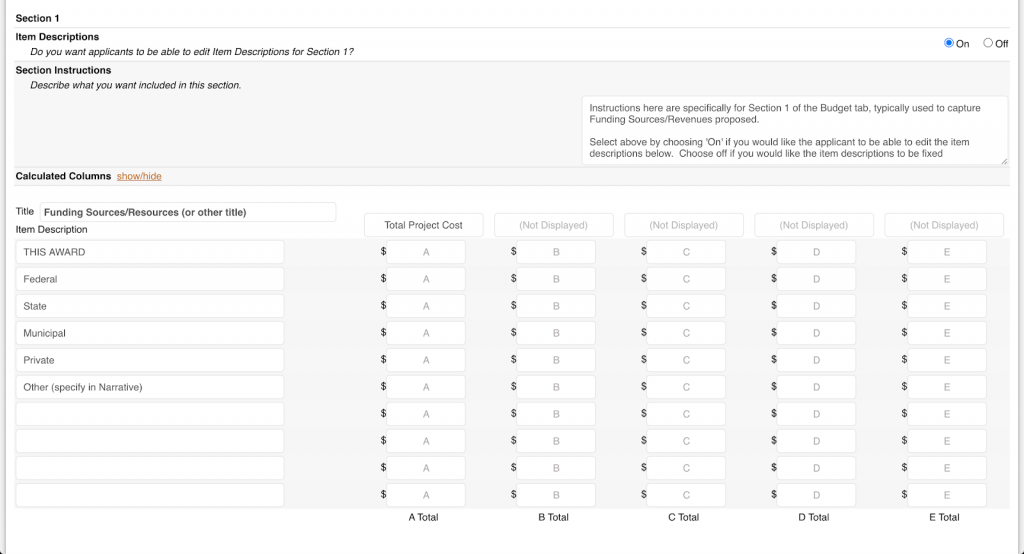
Section 1
The first, smaller table has up to 10 line items and is great for capturing funding sources. There are up to five columns available for applicant data entry, and up to five Calculated Columns can be added to present calculated data to administrators and reviewers in their version of the application, as well as in the application’s print preview or PDF versions.
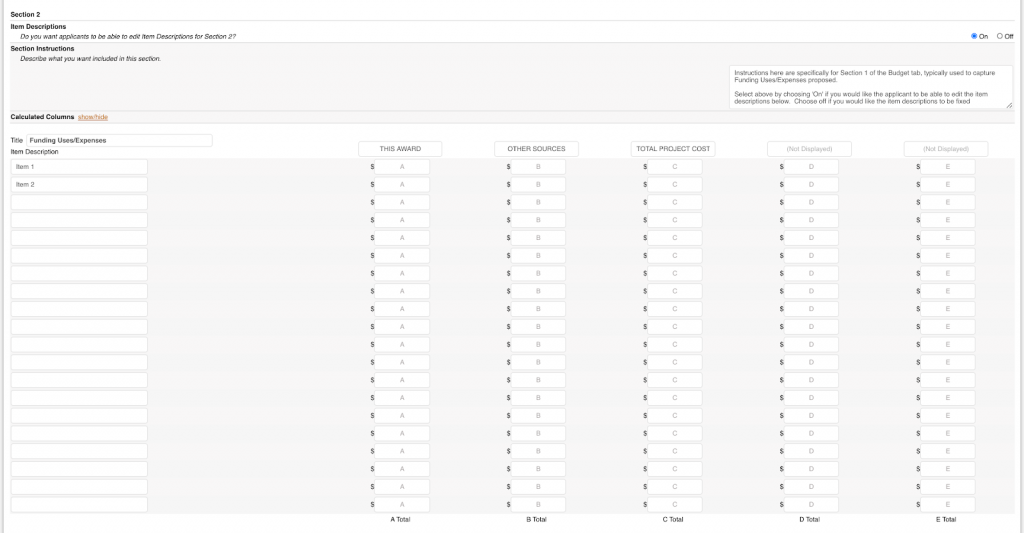
Section 2
The second, larger table has up to 20 line items and is great for capturing funding uses. As with section 1, there are up to five columns available for applicant data entry, and up to five Calculated Columns can be added to present calculated data to administrators and reviewers in their version of the application, as well as in the application’s print preview or PDF versions.
Budget Total Comparisons
These two fields can be used to compare the totals from any column in either of the budget tables – including the columns of applicant data and the calculated columns. The results of the comparison(s) are displayed to the reviewers and administrators in their version of the application, as well as in the application’s print preview or PDF versions.
This feature is especially helpful if applicants are required to have a certain percent match, or if the totals of columns from the two tables need to match. The system can do the calculation for you and present the results to administrators and reviewers right there within the application.
Budget Narrative
This feature presents a paragraph-style text field to the applicants in which they can provide a narrative response, according to whatever instructions you provide.
Contract Budget
The Contract Budget feature is part of the Funding Sources feature. Please contact us (adminquestions@zoomgrants.com) more information about this feature.
Budget Certification
Administrative users can now enforce a digital authorization process to ensure applicants thoroughly complete and review the Budget section before submitting their applications.
1. Customizable Authorization Statement
- Administrators can create a custom statement to clarify what applicants agree to or confirm.
- When utilized, this statement appears at the bottom of the Budget tab.
2. Digital Signature Requirement
- Applicants must provide a digital signature in the designated fields at the bottom of the tabs.
- These fields must be signed before the sections can be marked “complete.”
3. Completion Validation
- The Check for Completion feature will block application submissions if the required digital signatures are missing.
How to Set It Up
Program Setup > Settings Tab > Additional Program Modules >> Budget Tab
- Settings Tab
- Budget Tab
Turn the Budget Module ‘On’
Give the tab a Tab Label and provide instructions for your applicants.
Set up the features that you’d like to use (complete instructions below).
Sections 1 & 2
- Decide whether you want applicants to be able to edit the Item Descriptions/line items
- Choose ‘On’ to allow your applicants to enter their own items and/or edit those that you have entered as the defaults. Applicants will be able to use up to 10 line items in the section 1 and up to 20 in section 2.
- Choose ‘Off’ to prevent your applicants from entering their own or editing those that you have set up. Applicants will be limited to the line items that you have entered (up to 10 in section 1 and up to 20 in section 2).
- Provide Section Instructions.
- Give the section a Title.
- Pre-populate line items (if applicable).
- If you are allowing the items to be edited by the applicants, applicants will be presented with every line in the section, regardless of whether you enter a sample description. You can leave them all blank, if you want applicants to enter their own items.
- If you are not allowing the applicants to edit the items, only those lines with text in the Item Description fields will be presented. Applicants will not be able to use the additional lines.
- Add Column Headers – Only columns with headers will be displayed.
- Add Calculated Columns – Click the show/hide link to add or edit your Calculated Columns. For admins and reviewers, calculated columns appear, in grey, alongside the applicant-provided data.

- Column Title
- Field 1 Column – What column do you want to use as the first part of the calculation?
- Operator – What do you want to do in your calculation?
- Simple:
- addition (+)
- subtraction (-)
- multiplication (*)
- division (/)
- Complex:
- % of total – Ex: (A/total of B)*100, where Field 1 Column is A and Field 2 column is B
- % of field – Ex: (A/B)*100, where Field 1 Column is A and Field 2 column is B
- % change – Ex: ((B-A)/A)*100, where Field 1 Column is A and Field 2 column is B
- sum (multi) – Ex: A+B+C+D, where A is the Field 1 Column and D is the Field 2 column
- Simple:
- Field 2 Column – What other column are you using in your calculation?
- Position After Column – After what column do you want this calculated column to appear?
Budget Total Comparison
- Add a Budget Total Comparison label.
- Set up your formula.
- Use the drop-downs to choose which columns to include in your calculation. The system will pull the totals from those columns to use in the calculation.
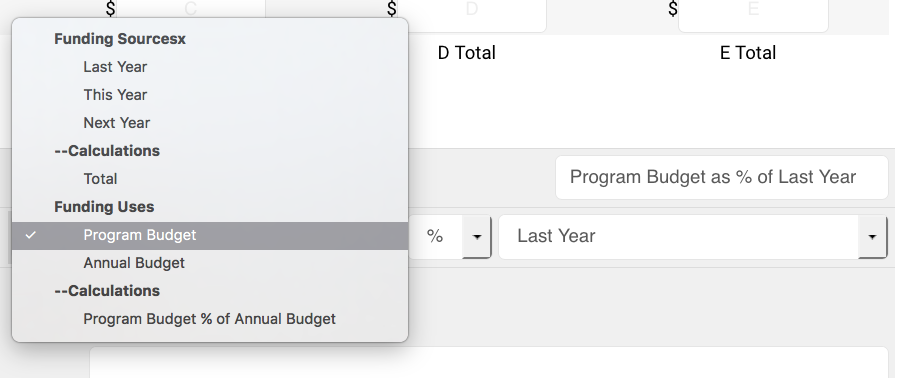
- Choose the operator to use in the comparison of the totals from each column.
- Use the drop-downs to choose which columns to include in your calculation. The system will pull the totals from those columns to use in the calculation.
- Type a description to explain what the calculation represents.
Budget Narrative
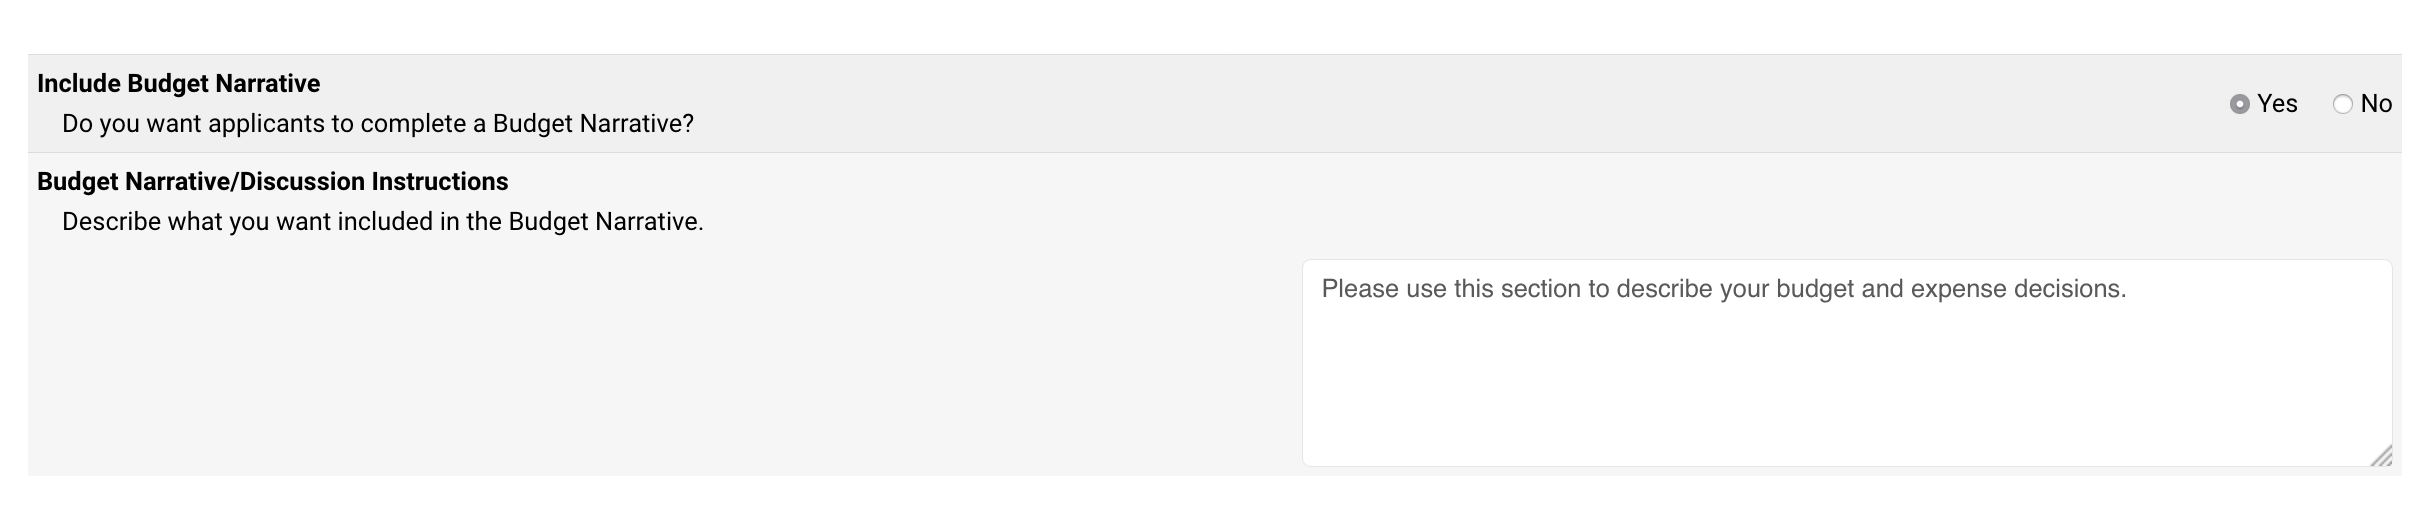
- Turn the Include Budget Narrative section ‘On’.
- Enter your Budget Narrative/Discussion instructions.
The character limit will be the same as the program default character limit, as set in the Settings tab.
Budget Certification Text
- Expand the Certification Statement setting.
- Enter the text for the authorization statement that applicants should see.
- Entering text turns the feature on. If you do not want to use this feature, leave the field blank.
Troubleshooting
As an alternative, you may want to ask applicants to complete a budget as a document upload or set up your own budget as a table in the Tables tab.