How It Works
Once the contract text is finalized and made visible to the applicant in that application, the contract is digitally signed by an administrator and up to two applicant or collaborator users. The digital signatures include the signature text entered by the signer along with their IP address and the timestamp of the signature. Once all parties have signed, the contract text cannot be altered.
How To Set It Up
Program Setup > Settings Tab > Additional Program Modules >> Contract Tab
- Settings Tab
- Contract Tab
In the Settings tab, under Additional Program Modules, turn the Contract module On.
Give the feature a Tab Label. Add any Instructions for your applicants.
- Add your contract text. This will be the template for the contracts created in individual applications. Use merge fields as placeholders for information that is unique to each applicant, such as the application title, award amount, and answers to Internal Research Questions. When the text is copied into each application, those merge fields will be filled with the appropriate information from that application.
- Add the signature instructions, which tell your applicants what information they need to enter when they sign the contract.
- If you’d like to require two applicant signatures to lock the contract, enter signature instructions for a second signer as well. If you leave that field blank, only one signature will be required from the applicant side.
Creating a Contract in an Individual Application
- Contract Tab
- Click the Copy From Template button to bring the contract text from the Contract tab in Program Setup into the application. The merge field placeholders will be populated with the relevant data from that application.
- Make any changes, as necessary. (The Copy From Template button will be disabled after you click it once to bring the new text into the contract field, which will help you avoid inadvertently re-copying the text and erasing your changes. If you need to copy the text from the template a second time, refresh the page, then click the Copy From Template button again.)
- Make the tab and the text viewable to the applicant by selecting ‘Yes’ from the Viewable dropdown. The applicant will be able to click into that tab within the application in their account to enter their signature.
- When the applicant signature(s) is present, the administrator signature locks the contract.
Creating a Contract in All Approved Applications (Mass Update)
Your Program > Applications Tab
- Applications Tab
In the Applications tab, click the Mass Update of Contract Text button at the bottom of the page.
- After clicking this button, ZoomGrants will identify all applications with an Official Decision of ‘Approved’ that have yet to receive the contract.
- Click ‘Copy Contract Text’, to copy the contract text template from Program Setup. This will make the text viewable to those officially approved applicants that were identified as missing the contract.
Using the Contract Signatures Report
Your Program > Data Tab > Standard Reports & Exports
- Data Tab
Click into the Data tab and choose the Contract Signatures report at the bottom of the Standard Reports & Exports section on the right side of the page to view a report showing each approved application and the signatures that have been added to it.
Troubleshooting
Why can’t this user see the contract I’ve set up?
Are the application and contract set up correctly?
- Is the application marked ‘notified‘?
- Does the contract have text?
- Has it been made viewable to the applicant?
Is the user logging into the correct account?
A user will only be able to access and sign the contract if they are either:
- Logging into the application owner’s account OR
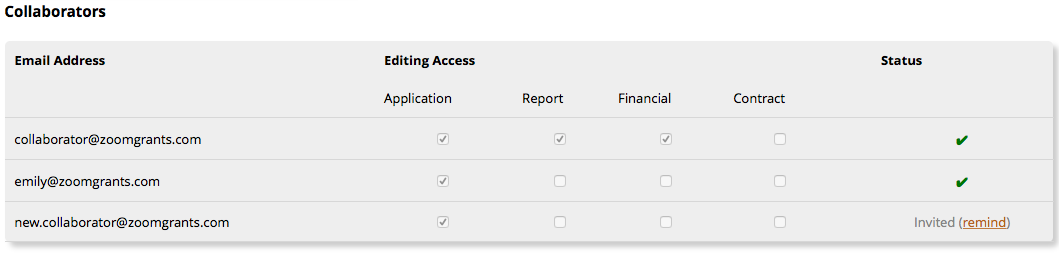
- Logging into a collaborator account that has been given access to the application AND has permission to access the contract
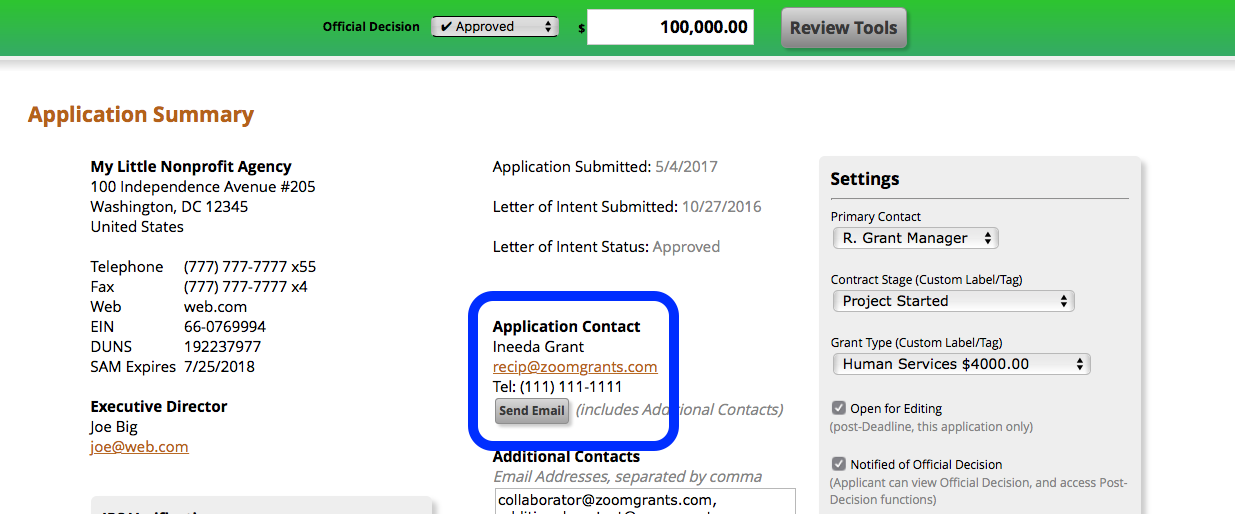
Check in the Application Summary tab to see who the application owner is. They’ll be listed in the center under the page under the Application Contact header (though yours may be labeled differently).
Scroll down in the Application Summary tab to see who has been invited as a collaborator on the application. Note the Editing Access columns.