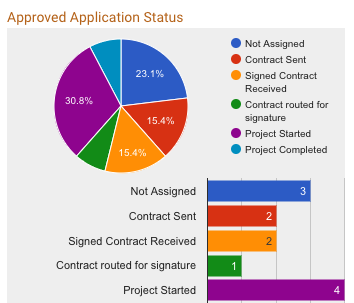
 The Custom Status feature allows administrators to group applications together into predetermined categories.
How It Works
For each program, admins can create up to six custom statuses. Each custom status consists of a label (‘Application Type’, ‘Fiscal Year’, ‘Review Stage’, etc.) and a list of options, one of which is assigned to each application.
Once a custom status option has been assigned to applications, the custom statuses can be used to quickly filter applications via the Dashboard, Application Lists, and Scoring Report as well as in reports run in the Data tab.
This feature can be used to set up a variety of categories. Some of our clients use the custom status to categorize applications based on federal funding pots (CDBG, CSBG, HOME, etc.), while others use it to track applications as they move through their organization’s workflow (initial review, verified, contract sent, etc.). The possibilities are practically endless!
How to Set It Up
Program Setup > Settings Tab > Custom Status
- Settings Tab
Click into the Settings tab in Program Setup. Scroll down to the Custom Status section, near bottom of the tab. There are four custom statuses, and each is set up in the same way.
- Click the + Button to Expand the Settings of a Custom Status/Stage.
- Input a Custom Status/Stage Label (the title).
- Add the Options (what value/category can be assigned to each application). Each option must be listed on its own line.
- Make the Custom Status viewable if you want the applicants to be able to see the Custom Statuses assigned to their applications.
How to Use It
Setting the Custom Status on An Application
- To change the custom status on each application individually, click into the Application Summary tab of an application and select the appropriate option from one of the Custom Status dropdowns in the Settings section on the right side of the page.
- To change the custom status on more than one application at a time, navigate to the Applications List and do a List Update.
Adding/Updating Custom Status Options
You can add additional labels to the options lists of any Custom Status at any time. Simply type in your new option at the bottom of the list. Adding an item in the middle of the list or reordering your items after you’ve assigned custom statuses to any application may negatively impact your existing data.
Deleting a Custom Status
If you need to delete a Custom Status entirely, use the List Update feature on the Applications List to remove all of those Custom Status labels from all applications by setting them to ‘-none-‘, then clear out the Custom Status setup in Program Setup.
