
How It Works
Program Setup > Pre-Application Tab
The Pre-App tab can be submitted for review prior to the completion of the full application.
If the Pre-Application (Pre-App) tab is turned on and is required in a program, applicants will create their applications and start by filling out just the first two tabs – the Application Summary and Pre-App. In those tabs, they’ll provide basic contact and organization information, answer any pre-app questions that you have posed, and upload documents as requested. After they’ve fulfilled those requirements, they then submit those sections for review by an administrator.
An administrator reviews and approves or declines the pre-app.
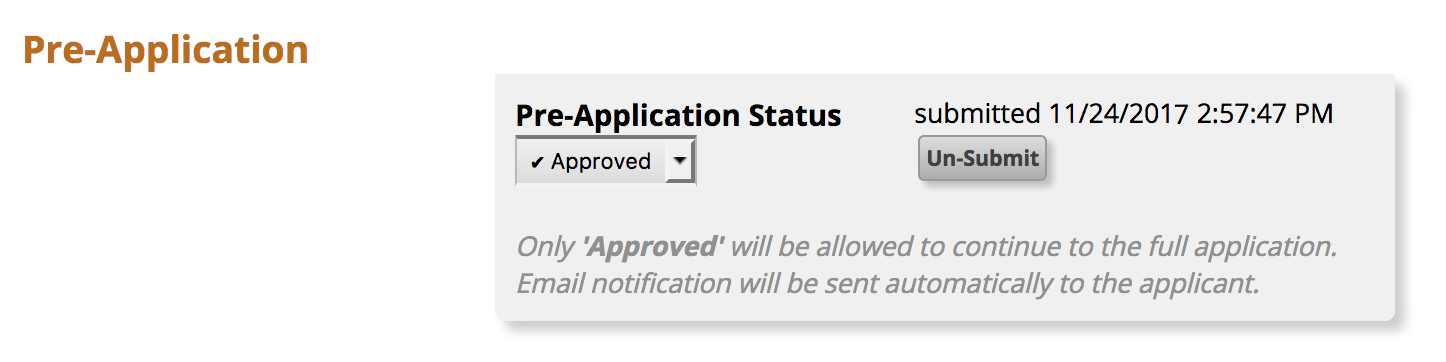
The Pre-Application Admin Contact (set in Program Setup, in the Pre-Application tab) will receive an email notification when pre-apps are received. They can go into each application, click into the Pre-Application tab and review the submitted information. Use the Pre-Application Status dropdown at the top of the tab to mark each one approved or declined.
If the pre-app is approved, the rest of that application can be completed and submitted.
If the pre-app is declined, that application cannot be completed or submitted.
To maintain the integrity of the Pre-App, the answers cannot be edited by the applicant once it has been approved or declined. If the applicant needs to make changes and re-submit the Pre-App, change the status to undecided, then click the Un-Submit button next to the Pre-Application Status at the top of that tab to return the pre-app to the application for editing. The applicant can edit the content in that tab, then re-submit it.
Each application has a separate pre-app.
There is a Pre-Application tab in each application. If your process requires that all applicants submit a pre-app in every application, you can allow the applicant to complete and submit the pre-app section in all of the applications that they have started. If your process only requires one of an applicant’s pre-applications to be submitted for approval, you can go into each of the other applications started by that applicant and approve the pre-application in those additional ones without them needing to even submit that section. Just open up the application(s) in your admin account, click into the Pre-Application tab, and choose “approved” in the status dropdown in each or do a list update to input those pre-app decisions even quicker! In this way, you can approve multiple pre-applications without the applicant needing to submit them.
How To Set It Up
Program Setup > Settings Tab > Additional Program Modules >> Pre-Application Tab
- In the Program Setup, click into the Settings tab.
- Turn the Pre-Application module ‘on’.
- Click into the Pre-Application tab.
- Give the tab a label.
- Set a deadline (if applicable). If you want to set a deadline for submittal of the pre-app, enter a date in the deadline field. This deadline is not tied to the overall program deadline, so remember to update it if you update your program deadline (if necessary).
- If you DO set a deadline, any applicants who create applications after the pre-app deadline will not be able to complete the rest of the application, because they can’t submit the pre-app.
- If you DO NOT enter a deadline, applicants will be able to submit their pre-apps up until the program closes. This is the default setting.
- Choose your custom settings:
- Require Pre-Application Complete – Applicants are normally required to fill out every question in the pre-app before it can be submitted, but you can choose “No” in this setting to waive that requirement to allow applicants to skip questions or submit a completely empty pre-app.
- Automatically Approve Pre-Application – If the pre-app content is completely optional and doesn’t need to be used to vet applicants, this feature submits and marks every pre-app approved as soon as the application is first created, allowing applicants to move on to complete the rest of the application without needing permission from an admin. They can complete the pre-app but are not required to.
- Add your instructions for the Pre-App tab.
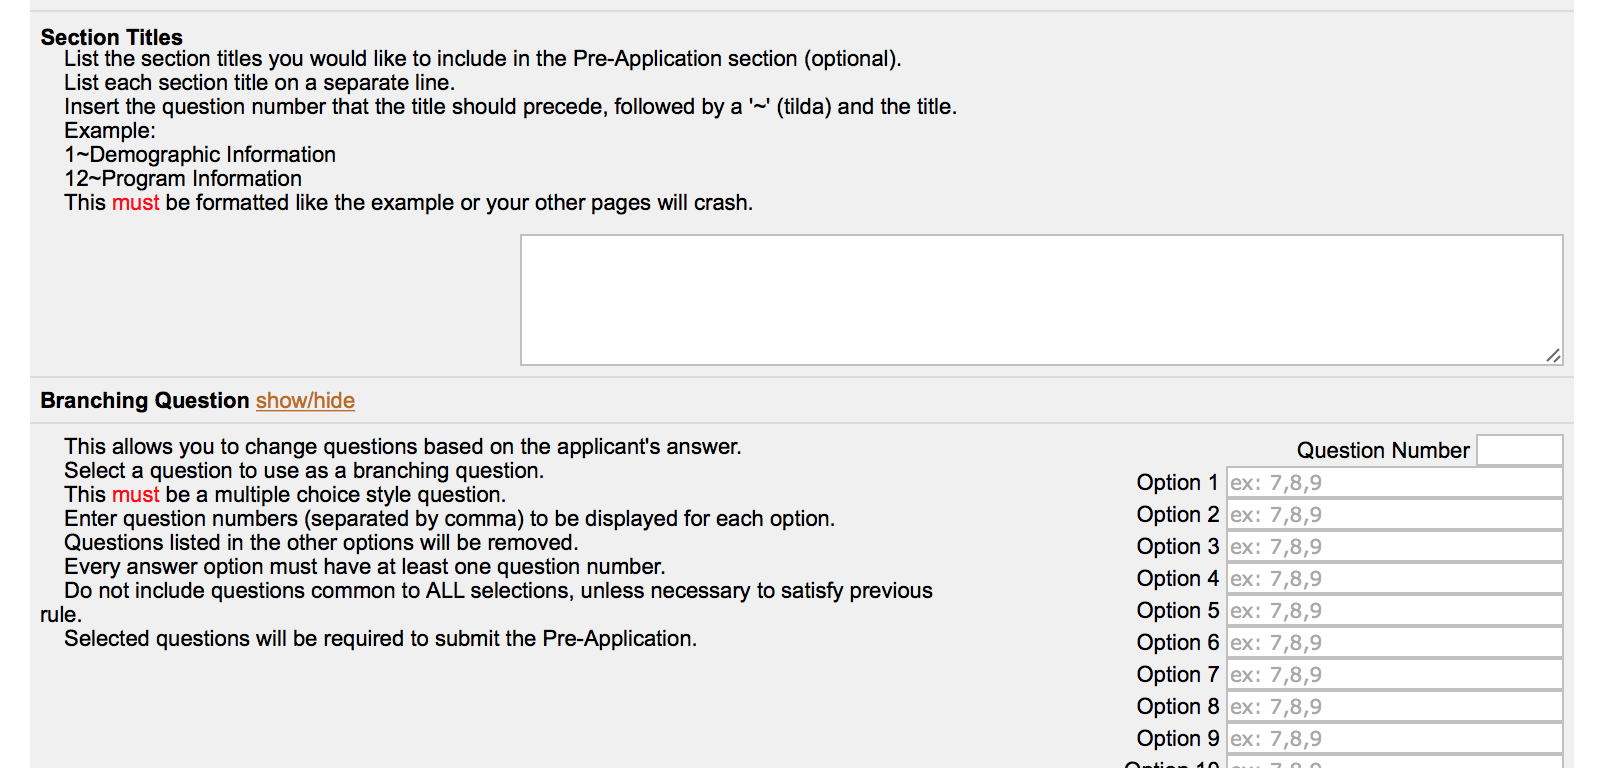
- Set up your question content (skip the Section Titles and Branching Question features, for now). Click the Add a Question button at the bottom of the tab to create new questions.

- Add Document Requests if you want your applicants to upload or link documents to their pre-application. You’ll add the requests at the bottom of the Pre-Application tab, in the same location that they will appear in the application itself. Use the Applicant View to verify the location.
- Add Section Titles and a Branching Question, if applicable, once you’ve entered all of your Pre-App questions.
- Use the Applicant View to check your work.

Troubleshooting
Applicants are able to submit an incomplete Pre-Application.
Check the “Require Pre-Application Complete” setting in Program Setup, in the Pre-Application tab. If set to “No”, applicants can submit their Pre-Application even if they have not answered all of the questions.
Also, check the “Automatically Approve Pre-Application” setting in the same Program Setup tab. If set to “Yes”, the Pre-Application becomes an optional component, as all Pre-Apps are automatically approved as soon as the application is created, thus bypassing the requirement to complete and submit the Pre-App.
Applicant is unable to see the approved pre-application.
Sometimes, if applicants have created more than one application, they may not realize that an approval in one Pre-Application does not mean that all of their Pre-Applications are approved.
The best way to make sure that you and the applicant are on the same page (literally) is to refer to the five digit application ID number at the bottom of any tab of the application. If you’re on the phone with the applicant, you can tell them that number and ask that they check their own application. If the numbers match and they still don’t see the Pre-Application as approved, ask them to refresh. If that doesn’t work, contact our tech support folks (adminquestions@zoomgrants.com). If the numbers don’t match, they’re looking at the wrong application. Have them refer to this help article for more information: Finding Your Applications.
Applicant only needs to have one approved pre-application for multiple applications.
Currently, if set up, the requirement to submit a pre-application applies to all applications that are created, regardless of whether an organization has already submitted one pre-application that has been approved.
As an administrator, you do have the ability to approve the pre-application portion of an application without the applicant submitting it. Simply click into that tab in the incomplete application and choose “Approved” in the Pre-Application Status setting. The applicant will then be able to complete the rest of the application without needing to complete or submit the pre-app.
Alternatively, you can use the auto-approve and require complete settings to turn off the requirement for the pre-application or allow applicants to submit incomplete pre-applications that can then be approved without being filled out.
Want to talk it over with a ZoomGrants support person? Just let us know!